Wednesday, 31 January 2018

Heartfelt Creations - Unfailing Love


Good Morning Everyone 
Can you Believe it is the
 last day of January already 
Shocking its gone so fast.
Today is my Post for Heartfelt Creations
With the Singing in Raining Collection 
that was released earlier this month 


HCD1-7169 Rain Boots and Blossoms Die
HCD1-7157 Eyelet Oval & Basics Large Die
HCPC-3814 Words Of Encouragement Cling Stamp Set
RACP005  Ranger Archival Ink Pad - Sunflower
HCDA1-449 Stack and Store Daubers-Pack of 6

Other Products:
8x8 Card Blank , White Card , Pearls,  Impress Inkpad Peony Purple and Emerald Green, Colorbox Chalk Berrylicious , Tacky Glue ,3D Foam Tape

For more tips on creating with the Singing in the Rain collection, watch the tutorial at https://youtu.be/_J85LChrXSs
Instructions:
Layer your 8x8 card with a sheet of patterned paper from the Singing in the rain paper collection cut a 6x6 panel of white card and 5 ¾ x5 ¾ panel fron the paper collection cut these in half corner to corner layer these together with glue , Adhere these to your card with 3d Foam tape
Using your Daubbers Stamp out all the Flower elemnts from the Rainboots and Blossom Stamp using  Impress Inkpad Peony Purple and Emerald Green Colorbox Chalk Berrylicious and Ranger Archival pad Sunflower ,
and colour before you die cut these out with  the Rainboots and Blossom Dies .
Cut out 2 of the Eyelet Ovals  in white card use one of these to ahere the flowers to with tacky glue and the ahere the other Eyelet oval ontop to make a sandwich . Stamp out your chosen Sentiment from the Words of Encouragement Stamps with Colorbox Ink Berrylicious and Die cut this out with a plain edge oval die from the Eyelet set  Adhere both of these to your card with 3d Faom and add Pearls to the corners of your card.

It's that time of year where you get to chose the current design team members that getting stay on the team for another year! And what a fantastic year I have had please pop over and give your vote.You can only vote once !!
You have to vote for 5 or more and I would love it if I was one of the 5 that you would chose
https://www.heartfeltcreations.us/blog/662/new-inspiration-with-the-singing-in-the-rain-collection-design-team-call

Thank you for your Visit and Vote 
Hugs Sand 

Thursday, 25 January 2018

Daisy's Jewels and Crafts - Hochanda Samples ( Picture Heavy)

Good Morning 
Today I am Back with Samples for 
These will be on Hochanda Today at 3 pm and 7pm 

First to show you is there Beautiful Chest of Drawers 
Covered with Fantastic Paper from Scrapberry's 
That will be on the Show too 


Next we have the 12 inch Clock which come with 
the Mechanism and Stencils 


Lastly I have the New Storage Box to show you 
I love this Storage I can see me purchasing a few of these 


Thank you so much for calling by 
Hugs Sand xx


Wednesday, 24 January 2018

Heartfelt Creations - Layered Card

Good Morning everyone 
Today's post is for 
Heartfelt Creations 
I have used the new 
Singing in the rain Collection 
combined with the Layered Cards 


Other Products:
Coloured Pencils, Ebosser, Emerald Green and Celeste Blue Ink pad

For more tips on creating with the Singing in the Rain collection, watch the tutorial at https://youtu.be/_J85LChrXSs
For more tips on creating with the layered card & shadowboxes, watch the tutorial at https://youtu.be/DrMIKI-XTmI.

Instructions:
Assemble the Layered card from the back forward Cut 11 6x6 panels from theSinging in the Rain  paper collection  Use the Eyelet Circle and Basics Small Dies and Circle Basics Large Dies to cut out the centres then glue these onto each page of your layered card
Spamp Colour and Cut out all of the elements from the Rain Boots  and Blossom's ,Songs of Spring ,Singing in the rain and Birds and Blooms Cling Stamp Sets
Adhere these to your card through out each of the pages.

Thanks For calling by 
Hugs Sand x

Wednesday, 17 January 2018

Heartfelt Creations = Mdf Boots

Good Morning it's that time of the week 
where I share my DT Inspiration for 
Heartfelt Creations 

HCD1-776 Eyelet Oval Die 
Other Products:
Ribbon, Coloured Pencils, MDF Boots from Daisys Jewels and Crafts, Tacky Glue, Ebosser .

For more tips on creating with the Singing in the Rain collection, watch the tutorial at https://youtu.be/_J85LChrXSs. 
Begin by covering your Mdf with paper from Singing in the rain paper collection ,on the inside make pockets to add Jorunaling Tags 
Spamp Colour and Cut out all of the elements from the Rain Boots  and Blossom's ,Songs of Spring , Stamp the Girl from Singing in therain stamp set colour and Cut her out using the Eyelet Oval Die, Stamp out a sentiment from Raindrop Sentiments Cling Stamp Set cut this out with the Eyelet Hearts Die 
Adhere all these elements to the front if your Boot  add ribbon to the two holes at the top of the boots to hold them together

Thank you for your Visit
Hugs
Sand x

Wednesday, 10 January 2018

Daisy's Jewels and Crafts = Valentines Inspiration


Good Morning my second post today for 
Daisy's Jewels and Crafts 
I created this Pot Pourri Hanger 
with some mdf hearts 


Products Used   

Mdf Hearts Different sizes available
  Mdf Glue 
Pot Pourri

Thank you for calling 
Hugs Sand 

Heartfelt Creations - NR Singing in the Rain Collection


Good Morning today Heartfelt Creations has 
a Brand New Release 
Singing in the Rain 

HCPC-3811 Rain Boots and Blossoms Cling Stamp Set
HCD1-7169 Rain Boots and Blossoms Die
HCPC-3812 Raindrop Sentiments Cling Stamp Set
HCDP1-286 Singing in the Rain Paper Collection
HCD1-7148 Window Frame Die
HCD1-7150 Window Box Elements Die
HCD1-7146 Festive Holiday Die
HCD1-7128  Wildwood Cottage Accents Die
HCPC-3772  Wildwood Cottage Accents Cling Stamp Set

 Products:
A5 Card Blank, White Card , Lace, Distress Ink Forest Moss ,Shabb Shutters , Impress Dye ink pad Peony Purple Die Cutting Machine Acetate 3D Foam Pads
For more tips on creating with the Singing in the Rain collection, watch the tutorial at https://youtu.be/_J85LChrXSs.

Instructions:
Take your A5 Card Blank Matt and Layer a piece of Patterened paper from the Singing in the Rain Collection  then a plain piece of white card
Cut out The inner  Window Die through all 3 layers, Add a piece of Acetate to the A5 card blank Glue your Patterened paper to the base card , Also add acetate to the rear of the White card , add some lace on top or the patterened paper Adhere the white card on top with 3d foam Pads
Cut one Window die, two Festive Holiday Die and the Window Box Elements glue these to your card
Stamp a sentiment from the Raindrop Sentiments Cling Stamp Set onto your Window Box Glue under the Window
Stamp the Rain Boots and Blossom Stamp with Distress ink Forest Moss and Peony Purple Impress Dye Ink  shade the Flowers with the Same Peony Purple Ink and the Leaves with Shabby Shutters Distress Ink
Die Cut these and arange on the Card  Lastly Stamp Colour and Die cut the Grass from The Wildwood Cottage Accents Glue these over the Row of Flowers along the Bottom

Thanks For calling 
Hugs Sand xx

Monday, 8 January 2018

Daisy's Jewels and Crafts = MDF Clock

Good Morning everyone 
Hope you are all well I know there is a lot of nasty stuff 
going around Luckily I have not had it 
On to todays post for 
I have created this MDF Clock 


Products Used 
MDF Clock  MDF Glue Clock Mechanism  GreyBoard Heartfelt Creations Blazing Poppy stamp and Die, Black Gesso Grey and White paint Silhouette cameo for Letters and Black Board Paint

Thank you for calling by 
Hugs Sand xx

Wednesday, 3 January 2018

Pencil Box


Good Morning to you all ,
My second post for today is for 


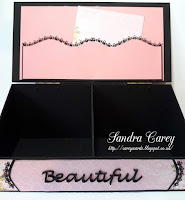
Firstly Glue your Pencil Box together with Daisy's MDF Glue Leave that Dry Next paint with Black Gesso and Leave Dry , measure and cut out Papers to cover the pencil box use The MDF Glue to stick these on to the Box lastly add some hinges so you open the lid

Thanks for calling by 
Hugs Sand xx

Heartfelt Creations - Moments to Remember

Good Morning It's my first post of the year 
and it is Wednesday so that means it is for 
Heartfelt Creations 


PGM15015 Crystal Clear 
Other Products:
Colored Pencils, Memento Rose Bud and New Sprout, Distress Ink Peeled Paint, Ribbon, Pearls on lace, White Card , Hot Glue Gun

For more tips on creating with the Camelia Carnation collection, watch the tutorial at https://youtu.be/rhk76SAIgWQ
Instructions:
Cut 3 Peices of Grey Board 2@ 7.5x8.5 and 1@ 3x 8.5 Bind these together with White card stock and add Page spine as Tutorial
( http://careyscards.blogspot.co.uk/2016/01/mini-album-tutorial.html )
Cut 3 panels of paper from the Cameila Carnation Collection to cover the front 2@ 7.25x 8.25
and 1@ 2,75x7.25 Glue these into place use white card stock to make your pages  Cut your pages to size 6 ¾ x 7 ¾  Place your  Fleur Border Basics die level at  the top of your page and run through your Die cutting machine ( do this for all 6 pages ) and Glue these into your album next cut down your chosen papers from the Papers to the correct size of your page 6 ¾ by 7 ¾  ( you will need 12 of these )  and add the Border basics die to the top of the page  and run through your Die cutting machine do this for all 12 pages Glue these into place one on each side of  your white cardstock.
Make 12 pockets by cutting white card stock to 6 ¾ X 4 and repeat the same steps again with the Border dies.
Place Pearls with Lace over the Spine and overlap the Front and Back Cover, and the Edges at the open side.Add a Matt and Layer over the top and decorate with Eyelet Circles and Basics small die, Todays Quotes Stamp set and  Small Camelia Carnation

Thank you for calling
Hugs Sand x