Showing posts with label Tutorial. Show all posts

Monday, 25 September 2017

Christmas Tree Advent

Good Morning Hope you all had a lovely weekend today I am sharing the instructions for the Christmas Tree Advent Calendar from Daisy's Jewels and Crafts
Take all your pieces out of your Box Lay the Back of the tree on your Table Get your Mdf Glue and first add the alphabet  Letters into there corresponding Slots  Then Take the Numbers and slide them over the Alphas and into the corresponding slots
21125484_1129070680526961_4045526269817233359_o
You should have all the Pieces like this now
21106387_1129070243860338_570310370113935041_n
Then Glue the Front of your Advent Calendar with Mdf Glue
21231004_1129070263860336_2336770392683185371_n
 Next Lay out all the Drawer pieces into Piles and find the corresponding sections Glue these together
22041959_1147727328661296_3040540290873568070_o
After all the Glue has dried you cad Decorate your Tree like the one below With Paints or Papers, To put lights on your Christmas tree I used Battery Christmas lights and Hot glued them into place, next I cut Acetate to the correct size and sanded it with smooth sandpaper Use a hot glue gun to put the acetate on the Sides and some Velcro to the back of your tree and the Battery pack to keep Hidden
Thank you for your Visit 
Hugs S xx

Saturday, 16 September 2017

Heartfelt Creations Tutorial - Build a Beary Scene Card


Good Morning everyone 
Today I am sharing a tutorial I have done for 
Heartfelt Creations 
using there newest Release 
Beary Fun Collection 


HCPC-3797 Beary Fun Retreat Stamp Set
HCPC-3798 Happy Time Tree house Stamp Set
HCPC-3799 Sunflower Accents Stamp Set
HCDP1-282 Beary Fun Retreat Paper Collection
HCFP1-434-3 Pocket and Flipfold Inserts B-Kraft 7” x 21”
HCD1-7118 Delicate Border Basics
HCD1-7119 Classic Border Basics
HCD1-7155 Large Circle Dies
HCD1-7154 Small Circle Dies
HCDA1-449 Stack and Store Daubers Pack of 6
TSMP800 Memento Dye Ink Pad Rich Cocoa

Other Products -  Kraft Card,  Distress Inks, Rusty Hinge ,  Wild Honey, Mustard Seed, Peeled Paint, Broken China, Pumice Stone, Scattered Straw, Walnut Stain, Dove Blender Pen, Tacky Glue, Red Liner Tape

Instructions
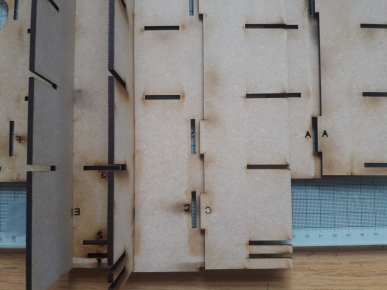
Begin with Finding the 7” x 21” pocket and flip fold album Cut 2 of your Patterned 12 x 12 paper down to  12 x 6.87  Die cut The Leafy Delicate Border Basics onto the small section of your Flip Fold
Cut a 2“ Strip off your Patterned paper that we just trimmed Use the Classic Border Basics to the edge of this and die cut Edge the card and paper with Memento Rich Cocoa Dye ink and glue this into place


Cover the rest of the panel with paper from the on we have already trimmed down to size inking all the edges on both the card and paper  use red Liner tape to stick down 2 of the folds to make pockets
On the Large end panel both sides you need to Die cut the edge of the paper with Delicate Border Basics If you don’t own a fine glue tip use the back of your hand to apply the glue to the delicate die cuts


Cut out 2 Large Circles (Largest Scalloped Die) from Kraft Card and 2 Small Circles ( the Largest of the Dies) out off patterned paper Ink the edges and adhere the patterned paper to the Kraft Card using tacky Glue


Adhere the Circles to the Front of your card and the inside bottom pocket, Die cut lots of the Stamps that come with this collection and Colour these with your Blender Pen and Distress inks
Insert these into the pockets


When your Pockets are full your card would look something like this ready for a child to pull out and play with (Build a Scene) You can the decorate the front of your card with your remaining stamped and Diecut Images


There are so many options for this design card how about leaving the stamps blank so children can colour them in themselves you could also make a play mat out of one of the 12x12 sheets of paper

Have a great weekend
Sandra x

Sunday, 26 June 2016

With All My Love


Good Morning again
my second post today
this time its for Crafters Companion 
I have a tutorial over on there blog 
today to show how I had this card 


Products used are 
Centrua Pearl cardstock
Red card 
Sheena Stamping card 
Spec Noir Pencils 9,25,28,48,114,116,118
With all my love Dis'ire Edge'ables
Happy Birthday Dis'ire Only Words Die (inside card)


Thank you for calling by
Hugs 
Sandra xx

Thursday, 14 April 2016

Doodle Book Tutorial


Good Morning 
I'm off out to the dreaded Dentist 
in a min But first I am sharing 
a tut on how I made a 
Children's Doodle book 
Great for when your out in 
the car or sat waiting somewhere
This was made with 
The new collection From 
Heartfelt Creations Berry Cafe 


Take 2 Pieces of 8x8 Grey board and cover
with Berry Cafe Collection HCDP1-265
Make Holes with what you have available in the centre of one side
To make the Pencil case take one sheet of paper ans score at
½ , 1 ,4,4 ½ 7 ½ and 8 Inches
Score up from the bottom of the page
½ inch Cut at 7 ½ inches from the bottom fold on all score
lines and glue the ends together to make a box shape Trim
the bottom corners up to the score line fold and glue
The make a Tab to fit over the top to close your Pencil case
I have used Velcro To hold the case closed for child safety

Add paper making strips I have added these  

Thank you for calling by 
Crafty Hugs 
Sandra xx

Monday, 25 January 2016

Mini Album Tutorial

Today I  sharing a step by step tutorial for you!

Take some chipboard and cut to these measurements
1x7 7x7 3x7 7x7 2x7 inches
Place them in that order on your table


Take 2 pieces of A4 card (good quality)overlap them and stick them together
Glue your pieces onto the card use 2 small  pieces of Chipboard as a spacer between each Piece


Mitre the corners of the card and attach tape as in the photo in between the gaps as well for strength
I like to use red tape


Fold over the edges of the card top and bottom first
When folding over the side tuck the corners in nicely so you don't see the chip board

Next cut some of the same card to cover the inside gaps
6 3/4 x 2 1/2 inches
6 3/4 x 5 inches
6 3/4 x 3 inches


Stick these down well

Next cut the supports for the pages
6 3/4 x 3 1/2 inches
6 3/4x 2 1/2 inches
6 3/4x 1 1/2 inches
score 1/2 inch on each side


Glue these down on top of each other and mitre the ends


Glue onto the small centre panel
Add your chosen papers to the uncovered Chip board

Next using the same strong card cut 6 sheets of 6 3/4 x 6 3/4 inches
These are the pages


When you have finished decorating your pages your album will be complete.
You don't have to add the closing part of the album and it would be made in the exact same way


Thanks for calling by 
Hugs 
Sandra xx

Sunday, 16 March 2014

Tando Creative Meets French Country

Good Afternoon everyone Hope your having a lovely weekend
I have been Busy Altering This Large Carriage Clock from 
Tando Creative which I picked up from my local craft Shop
I wanted to make it more 3d Because its Comes as a Flat Clock 
so I have made a small Tutorial to go with it 
  I Started by making a Hole in the Back Panel big enough to fit the Clock housing Inside Then with the Card that came in the pack I cut it into 3 inch Strips  then marked and scored 1/2 inch in from each side and cut Triangles into the score line so I could attach to the clock You need to use strong Tacky glue for this
 Once it was stuck I painted it Inside with some
 Black Paint because you will be able to see inside 


Then I added the Papers to the inside of the front panel before attaching the front off the clock Then Just Decorated With my G45  French Country Papers with a bit  of Black soot around the edges And Last added the clock Fixtures  


Thanks for Calling by and I hope this Tutorial will come in Handy at some point to you 
Hugs 
Sandra 
xx